
Why You'll Love It
- - No oven needed, perfect for hot days
- - Creamy custard balanced by light sponge
- - Simple, quick assembly that feels elegant
- - Versatile for birthday or casual snack
*"The texture was just perfect—like a cloud that melted in my mouth. My guests asked for seconds!"*
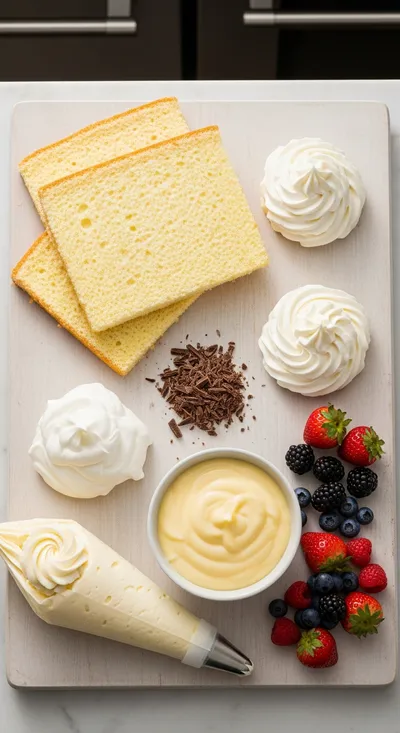
Essential Ingredient Guide
- Sponge cake: Choose a plain or vanilla sponge; it should be soft but sturdy enough to hold the custard.
- Vanilla custard: Use real vanilla bean or extract for depth; whisk until smooth to avoid lumps.
- Chocolate glaze: A dark or semi‑sweet chocolate gives a gentle contrast without overwhelming sweetness.
- Whipped cream: Stiff peaks add airy lift to the filling and keep the cake light.
- Sugar: Adjust to taste; the custard should be sweet but not cloying.
- Milk: Whole milk creates a richer custard; you can substitute half‑and‑half for extra silkiness.
Complete Cooking Process
-
Ingredient Readiness:
Measure and sift dry ingredients, whisk custard components, and let the sponge cool if pre‑baked.
-
Flavor Development:
Warm the custard gently to thicken, then cool it before folding in whipped cream.
-
Texture Control:
Layer the sponge and custard slowly to avoid soggy spots; keep the cake chilled to set.
-
Finishing Touches:
Drizzle chocolate glaze over the top, then refrigerate at least four hours.
-
Serving Timing:
Serve straight from the fridge; let each slice sit for a minute to reveal the layers.
- Use a metal loaf pan for even layering
- Cool custard completely before adding whipped cream
- Cover tightly with plastic wrap to prevent freezer burn
- Slice with a warm knife for clean cuts
Pro Tips
When you pull the cake from the fridge, take a moment to admire how the layers have settled. The aroma of vanilla and faint chocolate will greet you, a gentle reminder of the care you poured in. Honestly, these small steps make the difference between a decent dessert and a memory‑making one.
The essence of the dish:
A fun fact or historical angle:
Flavor or sensory focus:
You Must Know
- Keep the cake refrigerated at all times
- Use fresh ingredients for the best texture
- Allow the glaze to set before slicing
Frequently Asked Questions
→ Can I make this cake ahead of time?
Yes, you can assemble it up to a day in advance; keep it covered in the refrigerator.
→ What if I don’t have a chocolate glaze?
A simple mix of melted chocolate and a splash of cream works beautifully as a substitute.
→ Is it possible to add fruit?
Fresh berries can be layered between sponge and custard for a bright contrast.
→ Can I use gluten‑free sponge?
Absolutely—use a gluten‑free vanilla cake mix or homemade gluten‑free sponge.
→ How long does it keep?
Stored airtight, the cake stays fresh for 3‑4 days in the fridge.
→ Do I need to bake anything?
No baking is required; the custard is cooked on the stovetop and then cooled.
Nutrition Facts
per serving
420
Calories
6g
Protein
45g
Carbs
22g
Fat
Taste Profile
Creamy vanilla with a hint of chocolate
Ingredient Substitutions
Don't have an ingredient? Try these alternatives
Will add a richer flavor; adjust chocolate glaze accordingly.
Creates a dairy‑free version; may add a faint coconut aroma.
Recipe Variations
Try these delicious twists on the original
Chocolate Banana Twist
Add thin banana slices between layers and use a chocolate caramel glaze.
Coffee Infused
Mix a tablespoon of espresso into the custard for a subtle coffee note.
Common Mistakes to Avoid
Learn from others' mistakes for perfect results
- Over‑mixing the custard, which can make it grainy.
- Skipping the cooling step for custard before folding in cream.
- Using warm chocolate glaze, which can melt the custard layer.
Meal Prep & Storage
Make Ahead Tips
You can prepare the custard and whip the cream a day ahead; keep them separate and combine just before assembling.
Leftover Ideas
Refrigerate leftovers; enjoy within two days. Slice gently and let sit a minute before serving.
Perfect Pairings
Serve this with...
Cooking Timeline
Prepare and bake the sponge layers; let cool.
Cook the custard, then chill completely.
Whip cream and fold into chilled custard.
Assemble layers in loaf pan, add custard, top with sponge.
Melt chocolate glaze, pour over cake, refrigerate to set.
 Snacks & Appetizers
Easy Beef Empanadas
A step‑by‑step guide to making golden, flaky beef empanadas with simple pantry staples.
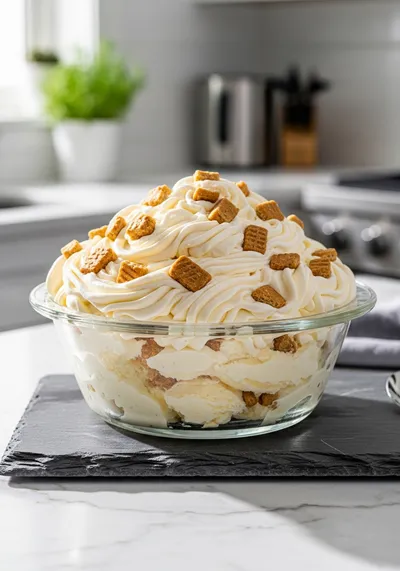
Boston Cream Icebox Cake
Layer light sponge with creamy Boston Cream Icebox Cake filling for a no‑bake dessert that's perfect for any occasion. This gentle, chilled treat lets the vanilla‑perfumed custard mingle with soft cake, creating a mellow sweetness that whispers of classic bakeries. Oreo Ice Cream inspiration adds a hint of nostalgia without overpowering the delicate texture.
Timing
Prep Time
20 Minutes
Cook Time
10 Minutes
Total Time
4 Hours (including chilling)
Recipe Details
Ingredients
Sponge
- 01 1 box (about 10 oz) vanilla sponge cake mix
- 02 1/2 cup milk
- 03 1/3 cup oil
- 04 2 large eggs
Vanilla Custard
- 01 2 cups whole milk
- 02 1/2 cup granulated sugar
- 03 3 egg yolks
- 04 3 tbsp cornstarch
- 05 1 tsp vanilla extract
- 06 1 pinch salt
Filling & Topping
- 01 1 cup heavy whipping cream
- 02 2 tbsp powdered sugar
- 03 1 tsp vanilla extract
- 04 4 oz dark chocolate, chopped
- 05 2 tbsp butter
Instructions
Prepare the sponge according to the box instructions, bake in a 9×13 inch pan, let cool completely, then cut into three even layers.
In a saucepan, whisk together milk, sugar, cornstarch, and yolks; cook over medium heat until thick, then stir in vanilla and salt. Cool fully, then fold in whipped cream.
Melt chocolate and butter together in a double boiler, stir until smooth, and let cool slightly.
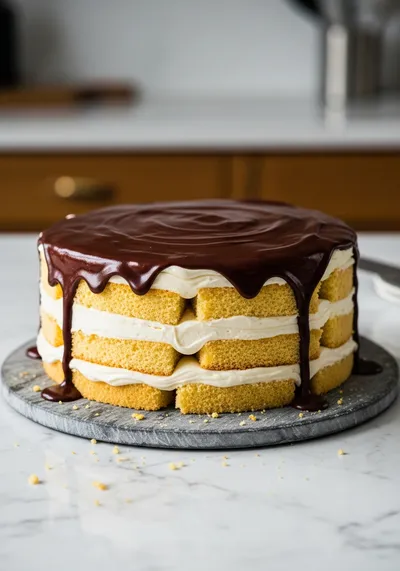
Place the first sponge layer in a loaf pan, spread half the custard over it, add the second sponge, the remaining custard, then top with the final sponge.
Pour the chocolate glaze over the top, smoothing with a spatula; cover tightly and refrigerate for at least four hours.
Notes & Tips
- 1 Make sure the custard is completely cooled before folding in whipped cream to avoid melting.
- 2 If you prefer a firmer cake, add an extra hour of chilling.
- 3 For a richer glaze, substitute half the chocolate with cocoa butter.
 Snacks & Appetizers
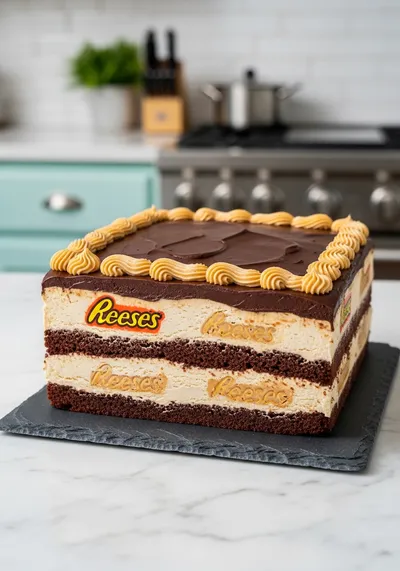
Reese's Peanut Butter Chocolate Icebox Cake
Creamy peanut butter meets chocolate in a quick, no‑bake icebox cake.
Tools You'll Need
-
9×13 inch baking pan
-
Medium saucepan
-
Whisk
-
Electric mixer
-
Spatula
-
Loaf pan for layering
Must-Know Tips
- Don't over‑mix the custard; gentle folding keeps it silky
- Let the sponge layers sit for a minute after layering to absorb custard evenly
- Taste the custard before folding in cream, adjust sugar if needed
Professional Secrets
- Use room‑temperature milk for a smoother custard
- Temper the eggs by whisking a little hot milk into them first
- Chill the assembled cake uncovered for 30 minutes, then cover to set glaze

Recipe by
AmeliaAmelia is the culinary heart behind Your Website, where she blends her love for home‑cooked comfort with a knack for innovative recipe development. Wi ...
Get Delicious Recipes Weekly
Join 25,000+ home cooks getting our best recipes straight to their inbox.
Free forever • No spam • Unsubscribe anytime