Why You'll Love It
- - No oven needed, perfect for hot days
- - Layers of texture: crunchy, creamy, smooth
- - Uses pantry staples you already have
- - Quick to assemble, impressively decadent
*"I couldn't believe it was no‑bake—so rich and satisfying!"*
Essential Ingredient Guide
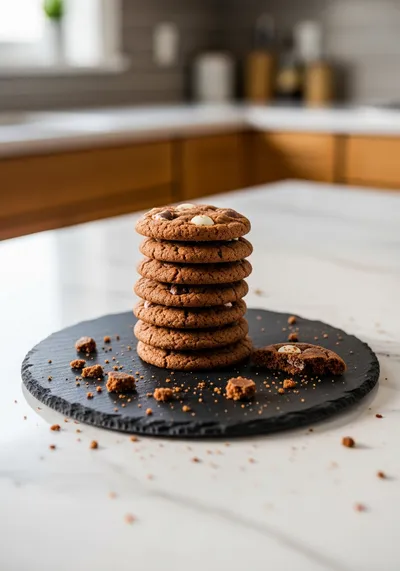
- Chocolate cookie crust: Choose a sturdy chocolate wafer or graham cracker; it provides a firm base and subtle cocoa flavor.
- Peanut butter filling: Use creamy, unsalted peanut butter for a smooth mouthfeel; stir in a touch of honey for gentle sweetness.
- Reese's pieces: Crushed candy adds crunch and bursts of salty‑sweet peanut butter flavor.
- Chocolate ganache: A simple mix of melted chocolate and a splash of cream creates a glossy finish.
- A splash of vanilla: Enhances the overall aroma without overpowering the Reese's taste.
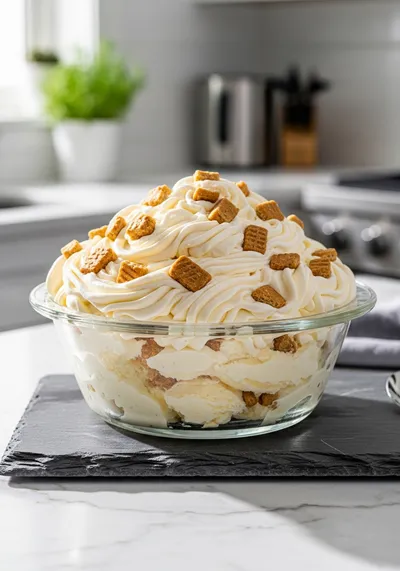
- Whipped cream: Lightly sweetened whipped cream stabilizes the layers and adds airy lift.
Complete Cooking Process
-
Ingredient Readiness:
Gather all components, crush the cookies, melt chocolate, and let the peanut butter come to room temperature for easy mixing.
-
Flavor Development:
Combine peanut butter with honey and vanilla, then fold in crushed Reese's pieces; let the flavors meld while the cake chills.
-
Texture Control:
Press the cookie crumbs firmly into the pan, then layer the peanut butter mixture evenly to avoid soggy spots.
-
Finishing Touches:
Spread a glossy chocolate ganache on top, garnish with extra crushed Reese's and a dusting of cocoa.
-
Serving Timing:
Allow the cake to set in the refrigerator for at least 4 hours, preferably overnight, for clean slices.
- Use a springform pan for easy removal.
- Chill the peanut butter mixture before spreading to keep layers distinct.
- For extra shine, melt a teaspoon of butter into the ganache.
- Slice with a hot knife for smooth edges.
Pro Tips
Well, these little adjustments can make a big difference in the final presentation. I’ve found that a hot, wet knife glides right through the chilled layers, giving each slice a clean, elegant look that makes the cake feel special, even when it’s just a weekday treat.
The essence of the dish:
A fun fact or historical angle:
Flavor or sensory focus:
You Must Know
- Keep the cake refrigerated the whole time.
- Do not over‑mix the ganache, it can become grainy.
- Allow the cake to sit after cutting for flavors to settle.
Frequently Asked Questions
→ Can I use a different nut butter?
Absolutely—almond or cashew butter works fine, though it will change the flavor profile slightly.
→ Do I need a springform pan?
A springform pan makes removal easy, but a regular 8‑inch cake pan lined with parchment works too.
→ How long can I store the cake?
Keep it refrigerated, covered, for up to 3 days. The texture stays lovely.
→ Can I freeze the cake?
Yes, wrap tightly and freeze for up to a month. Thaw in the fridge before serving.
→ Is the cake gluten‑free?
Swap the cookie crust for gluten‑free chocolate wafers and you’ll have a safe version.
→ What if I don’t have Reese’s pieces?
Crush any chocolate‑peanut butter candy you like, or simply add extra peanut butter for richness.
Nutrition Facts
per serving
420
Calories
9g
Protein
38g
Carbs
28g
Fat
Taste Profile
Rich, sweet‑salty chocolate peanut butter harmony
Ingredient Substitutions
Don't have an ingredient? Try these alternatives
Flavor changes, but texture stays smooth.
Will give a more intense chocolate flavor.
Recipe Variations
Try these delicious twists on the original
Spicy Version
Add a pinch of cayenne pepper to the peanut butter layer and drizzle a little chocolate chili sauce on top.
Mediterranean Style
Swap the chocolate ganache for a dark chocolate tahini swirl and garnish with toasted sesame seeds.
Common Mistakes to Avoid
Learn from others' mistakes for perfect results
- Overmixing ganache, leading to grainy texture.
- Skipping the chill between layers, causing soggy crust.
- Using too much butter in the crust, making it greasy.
Meal Prep & Storage
Make Ahead Tips
You can assemble the crust and peanut butter layer a day ahead and keep refrigerated; add the ganache just before serving.
Leftover Ideas
Refrigerate any leftover slices in an airtight container; enjoy within three days.
Perfect Pairings
Serve this with...
Cooking Timeline
Prepare crust by crushing cookies and pressing into pan.
Mix peanut butter filling and spread over crust.
Chill crust and filling while preparing ganache.
Melt chocolate, add cream and butter, then cool slightly.
Pour ganache over chilled layers, smooth top.
Refrigerate for at least 3½ hours before serving.
 Snacks & Appetizers
Easy Beef Empanadas
A step‑by‑step guide to making golden, flaky beef empanadas with simple pantry staples.
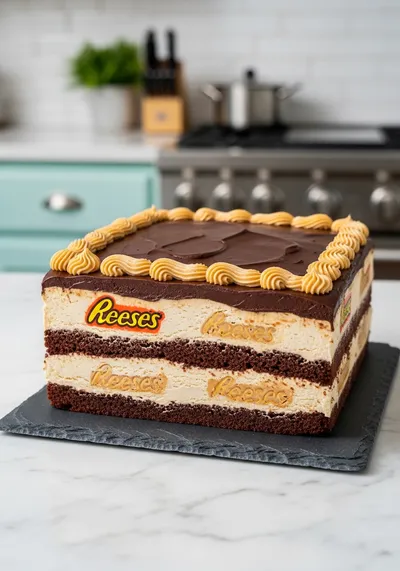
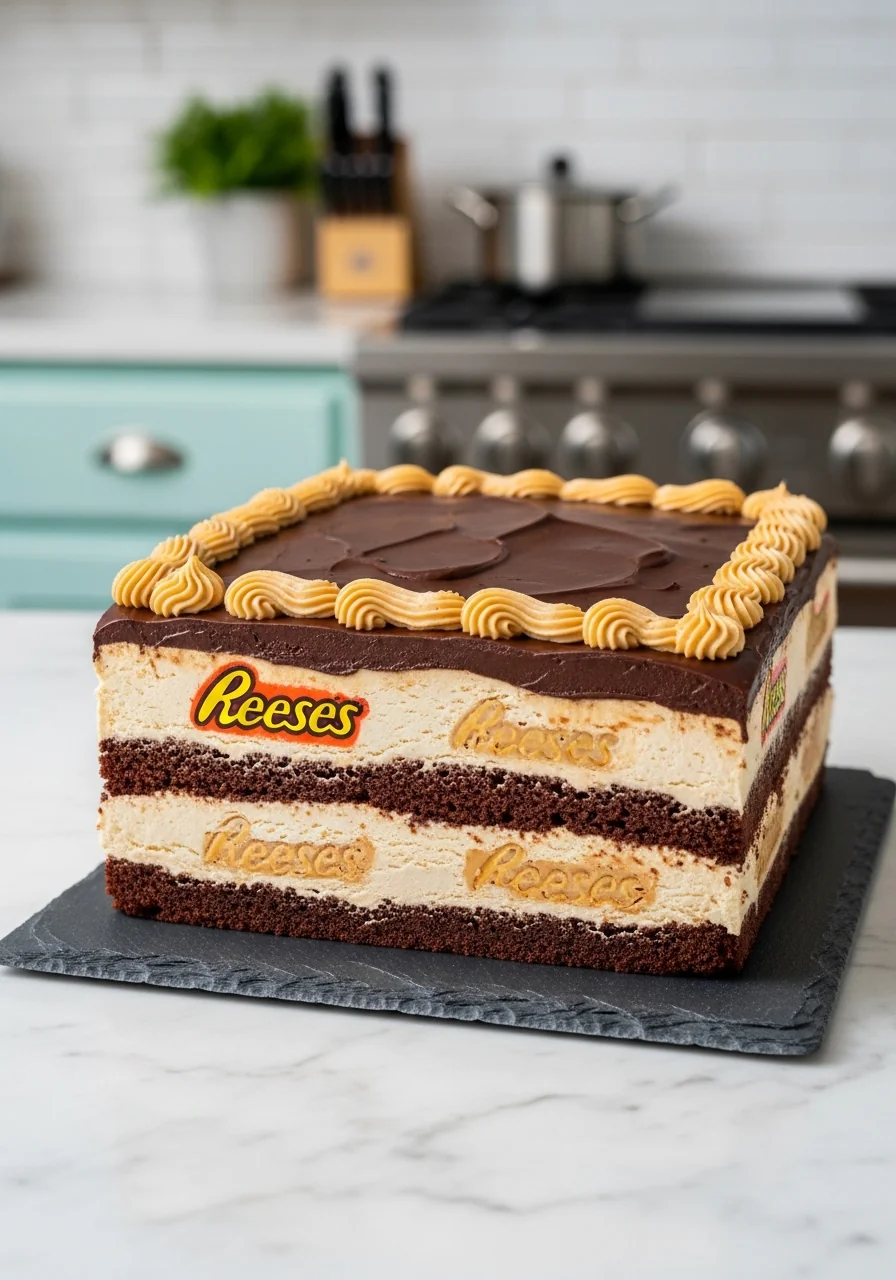
Reese's Peanut Butter Chocolate Icebox Cake
A no‑bake, indulgent cake layered with chocolate, peanut butter, and a crunchy cookie crust that melts in your mouth.
Timing
Prep Time
20 Minutes
Cook Time
0 Minutes
Total Time
4 Hours 20 Minutes
Recipe Details
Ingredients
Crust
- 01 2 cups chocolate wafer cookies, finely crushed
- 02 3 tbsp melted butter
- 03 1 tbsp granulated sugar
Peanut Butter Layer
- 01 1 cup creamy peanut butter
- 02 1/4 cup honey
- 03 1 tsp vanilla extract
- 04 1/2 cup crushed Reese's Peanut Butter Cups
Chocolate Ganache
- 01 8 oz semi‑sweet chocolate, chopped
- 02 1/4 cup heavy cream
- 03 1 tbsp butter
Topping
- 01 Whipped cream, lightly sweetened
- 02 Extra crushed Reese's pieces for garnish
Instructions
Combine crushed cookies, melted butter, and sugar in a bowl; press the mixture firmly into the bottom of a springform pan to form an even crust.
In a separate bowl, whisk together peanut butter, honey, and vanilla until smooth; fold in crushed Reese's pieces, then spread the mixture over the crust.
Place the pan in the refrigerator for at least 30 minutes so the crust sets.
Meanwhile, melt chocolate with heavy cream and butter over a gentle heat; stir until glossy and let cool slightly before pouring over the chilled peanut butter layer.
Re‑cover and refrigerate for at least 3½ hours, or overnight, until the ganache firms. Before serving, top with whipped cream and extra Reese's pieces.
Notes & Tips
- 1 If the ganache thickens too quickly, warm it gently before pouring.
- 2 For a lighter crust, reduce butter to 2 tbsp.
- 3 A pinch of sea salt on the ganache adds a subtle contrast.
 Quick & Easy Recipes
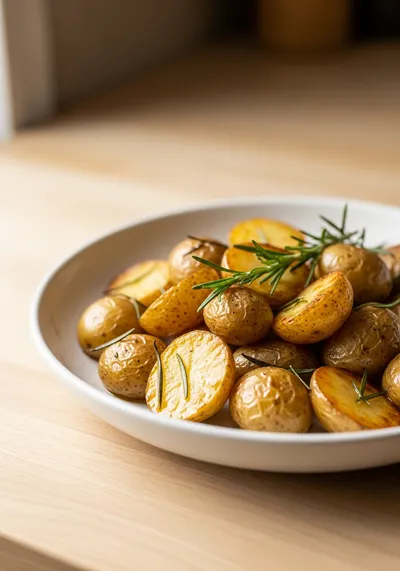
Oven Roasted Potatoes – Easy Healthy Side Dish
Golden, herb‑kissed potatoes roasted to crisp perfection, ready in under an hour.
Tools You'll Need
-
Springform pan
-
Mixing bowls
-
Food processor or zip‑top bag for crushing cookies
-
Spatula
-
Whisk
-
Refrigerator
Must-Know Tips
- Do not over‑mix the ganache; it can become grainy.
- Press the crust firmly to avoid cracks.
- Chill each layer before adding the next for clean separation.
Professional Secrets
- Room temperature peanut butter integrates more smoothly.
- Use high‑quality chocolate for a glossy ganache.
- Briefly toast the crushed Reese's pieces for extra depth.

Recipe by
AmeliaAmelia is the culinary heart behind Your Website, where she blends her love for home‑cooked comfort with a knack for innovative recipe development. Wi ...
Get Delicious Recipes Weekly
Join 25,000+ home cooks getting our best recipes straight to their inbox.
Free forever • No spam • Unsubscribe anytime