
Why You'll Love It
- - No oven required, perfect for hot days
- - Layers soak evenly for a melt‑in‑your‑mouth texture
- - Simple pantry staples, yet feels elegant
- - Quick assembly, yet impressive presentation
*"So light and airy—my family thinks it’s a bakery secret!"*
Essential Ingredient Guide
- Vanilla wafers: Choose fresh, crisp wafers; they absorb moisture without turning mushy.
- Pastry cream: A custard base of egg yolks, sugar, and vanilla gives richness and stability.
- Whipped cream: Lightens the filling; fold gently to keep air.
- Chocolate glaze: Use good-quality dark chocolate for a glossy finish and subtle bitterness.
- Lemon zest: Adds a whisper of brightness that cuts the sweetness.
- Sugar: Adjust to taste; a touch less helps the glaze set cleanly.
Complete Cooking Process
-
Ingredient Readiness:
Measure all components, whisk the custard, and chill the whipped cream before assembly.
-
Flavor Development:
Blend the vanilla zest into the pastry cream, allowing the aroma to infuse.
-
Texture Control:
Layer the wafers with enough cream to soften them but retain a subtle bite.
-
Finishing Touches:
Drizzle the chocolate glaze, then chill until set.
-
Serving Timing:
Let the cake rest in the fridge for at least two hours; slice with a warm knife for clean cuts.
- Use a metal spoon to smooth each layer for even soaking
- Freeze the glaze briefly before pouring for a glossy sheen
- Top with a pinch of sea salt to enhance chocolate depth
- Serve on a chilled plate to keep the cake firm
Pro Tips
I find that these small habits make a big difference. When the glaze is slightly chilled, it spreads thinly and sets with a beautiful shine. Also, letting the cake rest in the fridge lets the flavors meld, so the next time you slice, each bite feels uniform—soft, creamy, and just a touch chocolatey. It’s a gentle reminder that patience, even a few minutes, can turn a simple dessert into a comforting ritual.
The essence of the dish:
A fun fact or historical angle:
Flavor or sensory focus:
You Must Know
- Wafers absorb but should not dissolve
- Cream must be fully chilled before layering
- Glaze should be poured while still fluid
Frequently Asked Questions
→ Can I use gluten‑free wafers?
Yes, substitute with a certified gluten‑free vanilla wafer; the texture will be similar.
→ How long can I keep the cake?
Store it covered in the refrigerator for up to three days; the glaze may thicken but remains tasty.
→ What if I don’t have dark chocolate?
Milk chocolate works, though it will be sweeter; you may reduce added sugar in the glaze.
→ Can I add fresh fruit?
A thin layer of sliced strawberries or raspberries between tiers adds a pleasant tart contrast.
→ Do I need to whisk the custard over a stove?
Yes, gently cook the custard until it coats the back of a spoon to ensure safety and thickness.
→ Is the cake suitable for kids?
Absolutely—just keep the coffee or alcohol‑based flavorings out; the simple vanilla‑chocolate profile is kid‑friendly.
Nutrition Facts
per serving
310
Calories
5g
Protein
30g
Carbs
18g
Fat
Taste Profile
A balanced sweet‑chocolate finish with creamy vanilla undertones
Ingredient Substitutions
Don't have an ingredient? Try these alternatives
Whip it until firm; it will be slightly thicker.
Gives a slightly grainier texture but maintains depth.
Recipe Variations
Try these delicious twists on the original
Spicy Version
Add a pinch of cayenne and a drizzle of hot chocolate sauce for a subtle kick.
Mediterranean Style
Mix chopped pistachios into the glaze and sprinkle crumbled feta on top for a savory‑sweet contrast.
Common Mistakes to Avoid
Learn from others' mistakes for perfect results
- Over‑mixing the whipped cream, making it stiff
- Skipping the chilling step, resulting in soggy wafers
- Pouring glaze when too cool, causing a dull finish
Meal Prep & Storage
Make Ahead Tips
You can prepare the pastry cream and glaze up to 24 hours ahead; store each in airtight containers in the fridge.
Leftover Ideas
Refrigerate slices in a sealed container; enjoy within two days for best texture.
Perfect Pairings
Serve this with...
Cooking Timeline
Whisk egg yolks, sugar, and milk; heat to thicken custard.
Cool custard, then fold in lemon zest and half the whipped cream.
Layer wafers and cream in dish; cover and chill.
Melt chocolate, butter, and corn syrup; stir to smooth.
Pour glaze over chilled cake; refrigerate to set before serving.
 Snacks & Appetizers
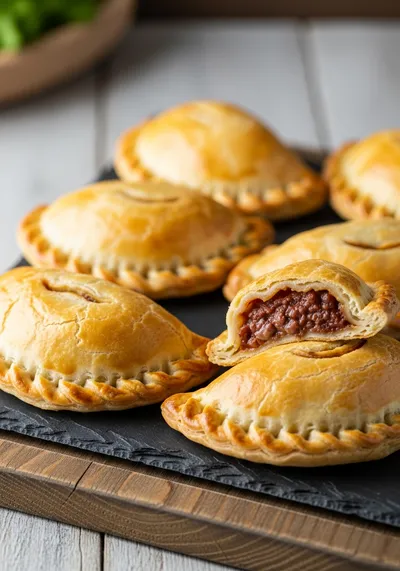
Easy Beef Empanadas
A step‑by‑step guide to making golden, flaky beef empanadas with simple pantry staples.
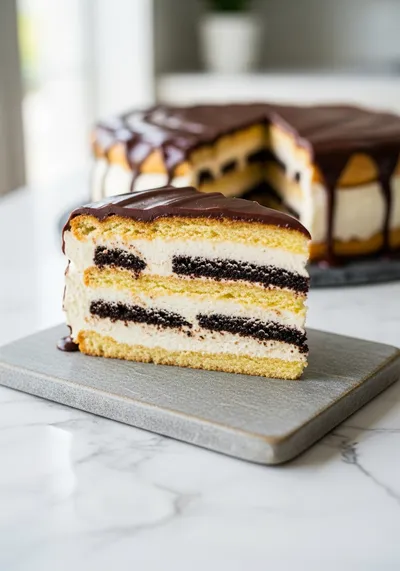
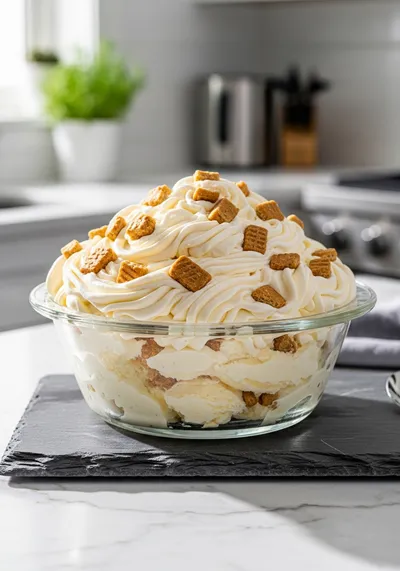
Eclair Icebox Cake
A light, fluffy cake that layers delicate vanilla wafers with silky pastry cream and a glossy chocolate glaze, perfect for lingering on a quiet afternoon.
Timing
Prep Time
20 Minutes
Cook Time
10 Minutes
Total Time
30 Minutes
Recipe Details
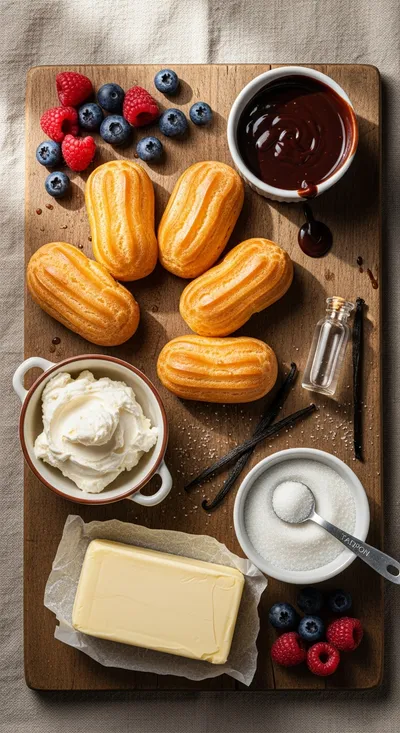
Ingredients
Main Ingredients
- 01 2 packages (about 200 g) vanilla wafers
- 02 1 cup heavy whipping cream, chilled
- 03 1/4 cup powdered sugar
- 04 1 tsp vanilla extract
- 05 1 cup pastry cream (custard)
- 06 2 tbsp melted dark chocolate
- 07 1 tsp lemon zest
For the Glaze
- 01 4 oz dark chocolate, chopped
- 02 2 tbsp unsalted butter
- 03 1 tbsp light corn syrup
Instructions
In a bowl, whisk the heavy cream with powdered sugar and vanilla until soft peaks form; set aside.
Combine the pastry cream with lemon zest; fold in half of the whipped cream for extra lightness.
Arrange a single layer of vanilla wafers in a shallow dish, then spread a thin coat of the cream mixture over them. Continue layering wafers and cream, finishing with a top layer of wafers.
Cover the cake and refrigerate for at least 90 minutes, allowing the wafers to soften.
While the cake chills, melt dark chocolate with butter and corn syrup over a double boiler, stirring until smooth.
Pour the warm glaze over the chilled cake, letting it spread to the edges; return to the fridge to set for another 30 minutes before serving.
Notes & Tips
- 1 If the glaze thickens too quickly, gently re‑heat it before pouring.
- 2 A pinch of sea salt on the glaze heightens the chocolate flavor.
- 3 For a richer flavor, use a splash of vanilla‑ infused coffee in the custard.
 Snacks & Appetizers
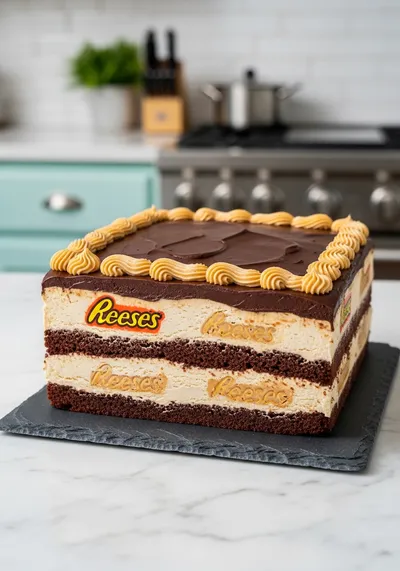
Reese's Peanut Butter Chocolate Icebox Cake
Creamy peanut butter meets chocolate in a quick, no‑bake icebox cake.
Tools You'll Need
-
9‑inch square dish
-
Spatula
-
Mixing bowls
-
Whisk
-
Double boiler or microwave-safe bowl
-
Measuring cups and spoons
Must-Know Tips
- Don’t over‑mix the cream; you want soft peaks, not stiff peaks.
- Let the cake rest fully; the textures only align after proper soaking.
- Use a warm knife to slice cleanly through the glaze.
Professional Secrets
- Chill the cream and custard separately; this keeps the filling airy.
- Add a touch of corn syrup to the glaze for extra shine.
- Spread the glaze while still warm; it sets with a mirror‑like finish.

Recipe by
AmeliaAmelia is the culinary heart behind Your Website, where she blends her love for home‑cooked comfort with a knack for innovative recipe development. Wi ...
Get Delicious Recipes Weekly
Join 25,000+ home cooks getting our best recipes straight to their inbox.
Free forever • No spam • Unsubscribe anytime